This post may contain affiliate links. If you purchase something through the link, I may receive a small commission at no extra charge. Please read my full disclosure policy.
Updated on July 23, 2024
Cricut Secret Santa. I created a personalized notebook and a pair of earrings with a special tag for my Cricut secret Santa gift using the Cricut Explore.
I am really excited to be participating in the Secret Santa gift exchange with Cricut. We were each paired up with a different blogger to get and receive a gift. I sent my package to my Secret DIY Santa today. I really love the way my present for her turned out.
My Secret DIY Santa is Kiki from Kiki & Company. Her blog is wonderful. She shares printables, works of art, recipes and projects. She recently shared the most adorable Santa’s beard countdown. Each night your kiddos get to cut off another piece of Santa’s beard.
SHOP CRICUT NOW
Use Code: LAURA10 to save $10 off any cutting machine or heat press (no minimum). Excludes materials, accessories, mystery boxes, etc. (US and CA only). Unlimited uses per code. Expires 12/31/24
Definitely, head over to her blog and see all the amazing things she creates!
And now, on to the present! I wanted to create something personalized for Kiki, so I decided to create an embellished composition notebook. I don’t think anyone can have too many notebooks. And with the new year getting ready to start, it is the perfect time to start a new one with goals, ideas or whatever you can dream up! And you can personalize the notebook to any theme.

This post contains affiliate links. See my full disclosure policy here.
Supplies needed:
- Composition notebook
- Patterned paper
- Textured cardstock
- Cricut Explore
- Mod Podge
- Paint brush
- Tacky tape
- Baker’s twine (optional)
To start with I traced the front and back covers onto patterned light blue and white polka dot paper. Then I cut each piece out.

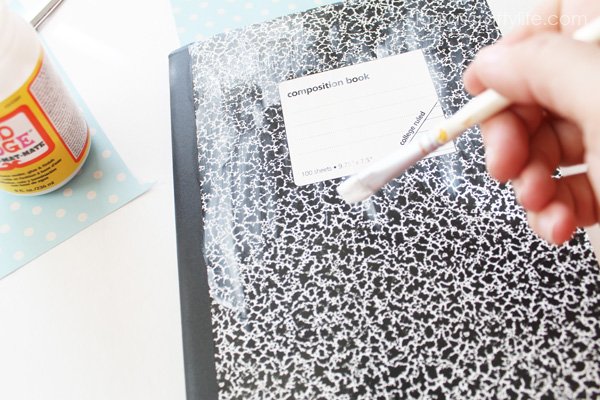
I applied Mod Podge to the cover of the notebook and adhered the cut-out polka dot paper to the front.

I did the same thing to the back side of the notebook. After it dries, you can trim up any excess paper around the edges using an X-Acto knife or scissors.

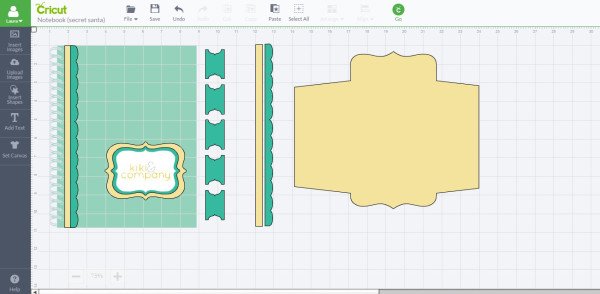
I designed the rest of the embellishments for the notebook in Cricut Design Space.

I used the logo from Kiki’s website. I started by setting my canvas to notebook and I entered in the dimensions of my composition notebook. This way each piece fits correctly and I can see how the finished project will look.
I created a layered tag with blue textured cardstock, the yellow patterned paper, and Kiki’s sticker logo. I added the logo so it would print then cut onto white sticker paper. I added a yellow patterned paper strip and scalloped light blue textured cardstock strip to cover up the edge where the polka dot paper meets up with the black binding. I created tabs to go inside the notebook so she can separate her notebook into sections and label them. I also created an envelope to go in the inside cover of the notebook.
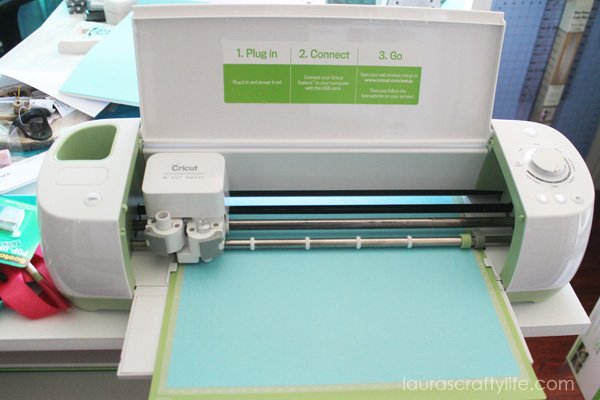
The first layer to go was the print then cut layer. I ran white sticker paper through the printer and then the Cricut Explore cut out the shape. I have found that with my particular sticker paper the best setting for cutting is the washi setting.
Then I cut out the light blue textured cardstock layer and the yellow patterned paper cardstock.
I adhered the yellow paper strip and the scalloped paper with Mod Podge to the edge of the notebook where the blue paper meets the black binding.

I attached all the pieces of the tag together with Mod Podge and placed the logo sticker on the top.

I wrapped a piece of yellow baker’s twine around the front cover and tied it in a bow. I attached the entire logo label with Mod Podge to the cover.

I repeated the process of tracing patterned paper for the inside cover and attaching it with Mod Podge. The paper I chose is a striped and floral patterned paper that matched the rest of the colors I picked out for the notebook.
I used tacky tape to attach the tabs to the notebook. Since the notebook has 100 pages, I divided it into five sections of 20 pages each. When adding tabs I find it easiest to add the top and bottom tabs, then the middle, and lastly the 2nd and 4th tab. This makes it easier to space them out evenly.


I used tacky tape to assemble the envelope and attach it to the inside cover.
I think the notebook turned out really cute!


I also made Kiki a pair of yellow earrings. I used the cabochon tutorial I shared earlier. I wanted to display them a little more creatively, so I cut out a Christmas tree shape with the Cricut on textured cardstock. I used the Cricut to write the ‘Merry Christmas’ saying on the card. I punched two small holes on the tree and added the earrings. The look like little ornaments on the tree.

To wrap up the earrings I added some crinkle paper and the Christmas tree earring holder to a clear cellophane bag. I tied it up with some yellow baker’s twine.

I hope Kiki likes her Secret Santa presents and I can’t wait to see what I am getting. I will be sharing all about what I got soon!
What is your favorite Secret Santa gift to give or receive?
CRICUT ACCESS SUBSCRIPTION
Purchase a Cricut Access Subscription to save! You’ll get unlimited access to the growing library of over 1,000,000+ cut and print images and over 1200 fonts. You’ll also receive a 10% discount on licensed content like Disney®, Marvel®, Star Wars™, Harry Potter™, and more. Plus, save 10% on cricut.com and subscriber-only exclusives. Get free shipping on orders over $50 and 20% off materials with a Premium membership. Learn more.


kiki comin says
it is seriously amazing! thank you SO much. merry christmas!
Laura Silva says
Aw. Thank you! I am so glad you like it. Have a wonderful Christmas!
xo,
Laura